The Lavender Soap I Finally Learned to Make at Home
For a long time, I wanted to make my own lavender soap but always felt a little unsure about the process. I kept saving recipes, bookmarking tutorials, and telling myself I would try it one day.
But that day kept slipping away. Then, one afternoon, while trimming the lavender in my backyard garden, I collected a basket of dried stems and flowers.
The scent filled the air, and something inside me clicked. I felt ready to finally try making the soap I kept dreaming about.
Gathering What I Need
I don’t have professional soap-making equipment, so I keep things simple and beginner-friendly. This is my homemade version.
Materials I prepare for one small batch (6 bars):
- 1 pound melt-and-pour soap base (I choose goat milk base because it feels gentle)
- 2 tablespoons dried lavender buds from my garden
- 1 tablespoon dried lavender petals for texture
- 15-20 drops lavender essential oil
- 1 teaspoon sweet almond oil
- Soap molds (silicone molds are easiest)
- A microwave-safe bowl
- A wooden spoon or spatula
- Rubbing alcohol in a spray bottle to remove bubbles
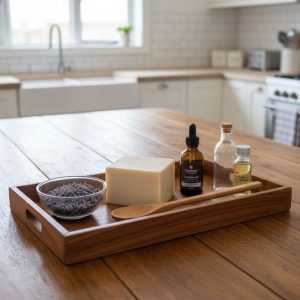
I place everything on the kitchen counter. The lavender buds sit in a small bowl, and the scent rises softly as I stir them with my fingers. It feels calming already.
Step 1: Melting the Soap Base
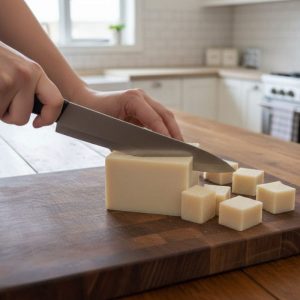
I start by cutting the melt-and-pour base into small cubes so it will melt evenly.
I place the cubes in a microwave-safe bowl and heat them in short 20-30 second intervals, stirring between each round. The base slowly turns from solid to smooth liquid.
Step 2: Adding Lavender Oil and Almond Oil

Once the base is completely melted, I let it rest for a moment so the heat settles. Then I add:
- lavender essential oil
- sweet almond oil
The almond oil makes the soap feel moisturizing, and the essential oil spreads a gentle scent through the entire kitchen. I stir everything slowly so the fragrance blends evenly.
Step 3: Mixing in the Lavender Buds
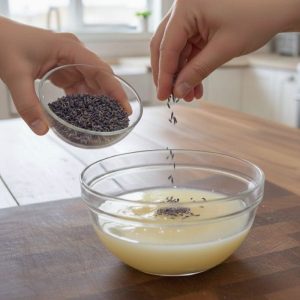
The dried lavender buds are one of my favorite parts because they come directly from my garden. I add the buds and petals into the bowl and watch them float in the mixture. They create tiny purple flecks throughout the soap, giving each bar its natural texture.
Next, I stir thoroughly so the lavender spreads evenly, but not too long, or the buds will sink all the way down.
At this moment, the bowl smells like fresh lavender fields, and I feel proud that all of this comes from such simple materials.
Step 4: Pouring Into the Molds
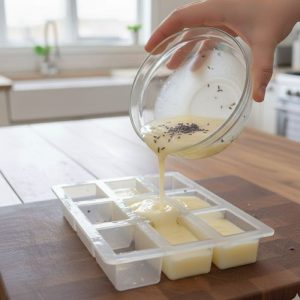
I place my silicone molds on a tray so I can move them easily later. Then I pour the warm lavender soap mixture into each cavity. The lavender buds settle softly inside.
To keep the surface smooth, I lightly spray the top of each mold with rubbing alcohol. This helps remove any tiny bubbles that appear.
Step 5: Letting the Soap Set
I leave the molds on the counter to cool before placing them in a quiet corner of the kitchen. The soap usually takes 3-4 hours to harden fully. Sometimes I leave them overnight if I’m not in a hurry.
While the soap rests, the faint lavender scent fills the room. It’s gentle, soft, and comforting.
Step 6: Removing the Soap From the Molds
Once the bars are firm, I pop them out of the molds carefully. Each bar looks slightly different because the lavender spreads in its own pattern. Some bars have clusters of buds, some have tiny speckles, and some show thin swirls of petals along the edges.
I gently trim any uneven spots and wipe off loose lavender pieces.
Holding the finished bars in my hands feels rewarding, not because they’re perfect, but because they came from my garden and my own effort.
Step 7: Storing and Using the Lavender Soap
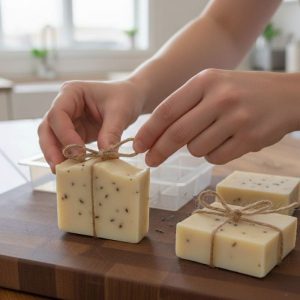
I wrap the bars in small parchment sheets and tie a piece of twine around each one. Then I place them in a wooden box I keep in the craft corner. The box slowly fills the room with a soft lavender scent.
I use some of the bars in the bathroom, and I save a few for gifts. Homemade soap feels personal, and I like knowing that each bar carries a little piece of my garden and my time.