The Night I Finally Decided to Keep Our Family Memories in a Jar
For a long time, I kept promising myself that I would organize keepsakes of our family life, especially after my baby was born.
I always imagined creating a memory book or a box filled with tiny notes, favorite snapshots, and little treasures from everyday life.
But motherhood moves quickly, and the days often slip by before I realize it. Months passed, and the printed photos kept piling up in small stacks around the house like on the coffee table, near the TV stand, inside bags I forgot to unpack.
One evening, when the house felt calm and my baby was asleep, I found myself gathering these scattered photos without even thinking. I sat down at the dining table, holding the small stack in my hands, and that familiar thought returned.
Step 1: Bringing Together the Materials I Already Have

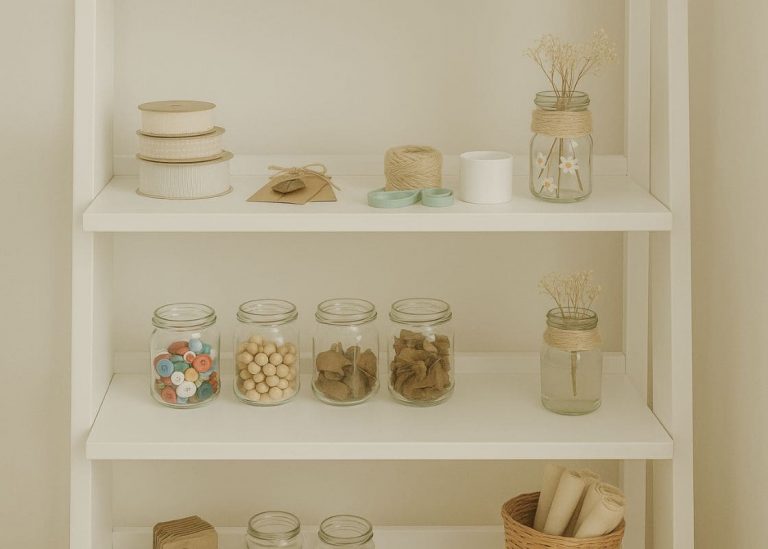
I walk through my craft corner, open a few small drawers, and gather everything that feels useful. I collect:
- A large mason jar with a screw-on lid
- A stack of instant photos, the ones that hold everyday moments of my baby and our family
- A small bag of glitter
- Micro fairy lights, the warm white kind that creates soft, cozy light
- Heart-shaped confetti pieces I once used for another project.
- A piece of twine
- A wooden stick from my craft box
When I spread everything out on the table, I realize I’ve had all the materials for months — I was simply waiting for the right moment to use them.
Step 2: Preparing the Jar So the Memories Look Beautiful Inside

Before filling the jar, I want it clean and clear. I rinse it with warm water, then wash the inside with a soft dishcloth so the glass stays streak-free. I dry it completely because even a small amount of moisture can make glitter clump or blur the photos.
Once the jar is dry, I hold it up toward the light to check for fingerprints or watermarks. The glass sparkles, and I know it will show the lights beautifully.
To create a soft, glowing base, I pour three to four tablespoons of glitter into the bottom of the jar. I gently tap the jar so the glitter spreads evenly. The layer doesn’t need to be thick, I want just enough shimmer to reflect the lights later.
Step 3: Sorting Through the Photos Slowly and Choosing the Ones That Matter
I place the stack of instant photos on the table and sort them carefully. Many of them aren’t perfect — some are slightly blurry, some capture messy moments, and some show us during normal, ordinary days. But these are the moments I want to keep. My child’s tiny smile, sleepy eyes, food-smeared cheeks, walks in the backyard, afternoons on the sofa, and simple family snapshots.
I choose the photos that remind me of how quickly my baby is growing. These are the ones I want to see glowing inside the jar. As I sort through them, I realize I finally have something meaningful to hold them.
Step 4: Arranging the Photos Inside the Jar With Care
I take a few photos at a time and slide them gently into the jar. I angle some slightly toward the glass and place others deeper inside so they overlap naturally.
I don’t want the photos to look stacked or pressed tightly, I want them to feel like little memories floating in a tiny space of their own.
Because the jar’s opening is narrow, I use the wooden stick to adjust the corners. I lift a few photos so they don’t hide behind others, turn some a little to the left or right, and create small layers so the jar looks full without feeling crowded.
This step takes a little time, but I enjoy it because I’m deciding where each memory should sit.
Step 5: Weaving the Fairy Lights Around the Photos
The fairy lights are what bring the jar to life. I gently twist the wire so it’s easier to guide through the jar. I tuck the battery pack at the bottom, carefully hiding it beneath the glitter so it won’t distract from the photos.
Then I start guiding the string of lights upward. I weave the wire softly around the photos, letting the light pass between them. I place a few lights near the front to brighten the faces in the picture, and some toward the back so the jar glows evenly.
The trick is to let the lights float instead of pressing them too tightly around the photos. When everything sits naturally, the jar looks warm and magical the moment the lights turn on.
I test it by switching the lights on, and the whole jar glows beautifully — warm, gentle, and full of tiny reflections.
Step 6: Adding the Final Touches That Make the Jar Feel Personal
Before closing the jar, I add a few pieces of heart-shaped confetti that settle softly between the photos and the glitter. They add a sweet detail without overwhelming the design.
Then I tie the twine around the jar’s lid to give it a handmade, cozy look. The twine adds a soft touch that blends well with the warm lights and glitter inside.
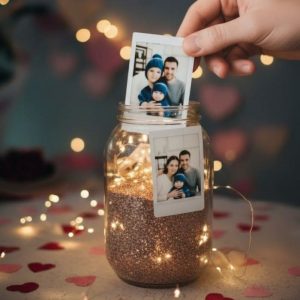
Step 7: Turning On the Lights and Seeing Everything Come Together
I turn on the lights again once the jar is fully assembled. The warm glow surrounds each photo gently, and the glitter at the bottom reflects tiny sparkles that shift every time the jar moves.
The moment feels emotional because I know these memories might have stayed scattered around the house if I hadn’t started this project tonight. Instead, they now sit together in a glowing little world I can see every day.
Step 8: Finding the Perfect Place for My New Memory Jar

I try placing the jar on a few surfaces around the house. I test the shelf near the living room wall, the small table beside my craft corner, and the dresser in the bedroom.
The jar fits best in the living room, where the lights reflect softly against the wall, and I can see it every time I walk past. It feels like a quiet reminder to slow down and cherish these small moments before they slip away.
Now, whenever the room is dim, the jar glows like a tiny lantern filled with memories, a small world holding the early years of my family that I don’t want to lose.