The Ways I Tried to Dehydrate Orange Slices at Home
Drying orange slices becomes one of those small seasonal habits that brings me more joy than I expect. I start doing it because I want natural decorations for Christmas, but it quickly turns into something I love doing even when it’s not a holiday.
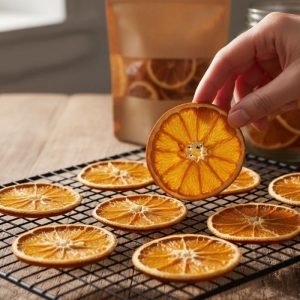
I feel comfortable about cutting fresh oranges, smelling the bright citrus scent filling the kitchen, and watching the slices slowly turn into warm, translucent circles that look like tiny suns.

I also enjoy how many ways I can use them such as ornaments, garlands, gift toppers, bowl fillers, drink garnishes, and even little decorations for my craft photos.
Gradually, I test several methods because each batch behaves differently. Some slices dry perfectly; others brown too quickly. Whereas, some stay bright; others fade. Each attempt teaches me something new.
This is the full, detailed journey of how I prepare the oranges, how I slice them, and the different drying methods I try until I find what works best for my home.
What to Do Before Any Drying Starts
Before anything, I choose oranges that feel firm in my hand. Soft ones have too much juice and take much longer to dry. Medium-sized oranges usually give the best shape. I also wipe the skin clean because I know I’ll be handling it a lot.
For one full tray, I usually prepare:
- 3 medium oranges
- A sharp, thin-bladed knife
- A stable wooden cutting board
- A clean kitchen towel or several paper towels
- A lined tray or a cooling rack
Slicing The Oranges
I learn quickly that slicing is the most important part. If one slice is too thick, the center stays wet. If another slice is too thin, the edges darken before the rest dries.
I try to slice every piece at 5 mm thick (about 1/4 inch). I’ve tested thinner and thicker slices, and this seems to give the best balance.
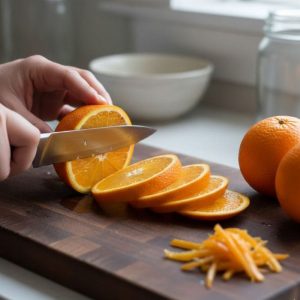
I place each slice on a towel and press gently with another towel on top. This removes just enough juice to speed up drying without flattening the slices.
Sometimes I cut a slice that feels uneven. Instead of keeping it, I put it aside for tea or snacking. Experience teaches me that uneven slices always cause trouble later.
The kitchen always smells warm and refreshing at this stage like soft citrus scent, juice on my hands, and a bright color that makes the whole counter look cheerful.
Method 1: Oven Drying (The Method I Rely on the Most)
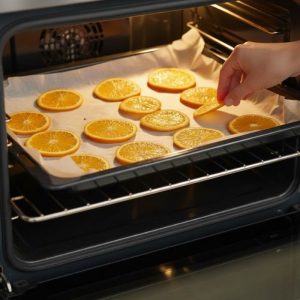
The oven is the first method I try and the one I use most often when I want predictable results.
I line a baking tray with parchment paper and arrange the orange slices in one flat layer so they don’t touch. Then I preheat the oven to 90-95°C (around 200°F), which helps the slices dry without turning brown.
The first hour usually feels slow because the slices still look wet, but the shine begins to fade little by little. I flip each slice after about 45 minutes to help them dry evenly.
As the hours pass, the edges become firmer, the centers turn slightly see-through, and the sweet citrus smell grows stronger in the kitchen. Most batches take 2.5 to 3.5 hours, depending on how juicy the oranges are, and I stay nearby so I can check on them toward the end.
When the slices finally dry, they look like small stained-glass circles. They stay bright, warm in color, and smooth around the edges. This method gives me the prettiest slices for garlands, ornaments, and jar decorations.
Method 2: Air-Drying Near the Window (The Slow, Gentle Way)
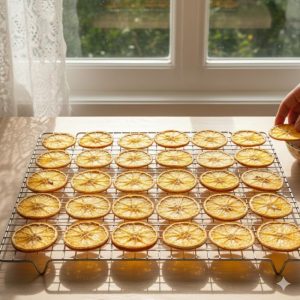
I try air-drying during a week when the sunlight feels stable and the air isn’t too humid. I place a cooling rack near a window where there’s good airflow and spread the slices out with a little space between each one.
This is how they usually change day by day:
Day 1: The tops feel less shiny, but the centers stay very moist. The scent remains bright and fresh.
Day 2: The skin becomes firmer, and the slices grow lighter in color. They still bend easily.
Day 3: The centers feel leathery instead of sticky. The edges start to stiffen.
Day 4: Most slices look almost completely dry, except for a few thicker ones that need more time.
Day 5: All slices feel firm and dry to the touch. They turn beautifully translucent with a softer, natural color compared to oven-dried ones.
This method takes patience, but it keeps the scent intact in a very gentle way. I just use it when I want a quieter, slower project that fits naturally into my days.
Method 3: Using a Dehydrator (The Most Even Results)

I test this method after borrowing a dehydrator from a friend. I arrange the slices on the trays, set the temperature to 60°C (140°F), and let the machine work slowly through the day.
What I notice is how steady the drying feels. There’s no risk of browning, and the slices dry evenly from top to bottom.
It usually takes 6 to 8 hours, and the slices come out looking very similar to each other with same color, same texture, same thickness.
They’re not as glossy as oven-dried slices, but they are incredibly consistent. This method works best when I want a large, matching batch for a craft project.
What I Learned From Trying These Methods
After many rounds of testing, I learn that the best method depends on what kind of day I’m having. When I want quick and pretty slices, the oven is always reliable.
When I want a gentle, natural result, the window method gives the softest color. When I want a dozen slices that all look exactly the same, the dehydrator is perfect.
The most important step, no matter the method, is slicing evenly and removing the extra juice before drying. This small habit saves so much time and helps avoid burnt edges or wet centers.
Now, drying oranges feels like a calm moment that breaks up my busy days. I like the way the kitchen smells during the process, and I enjoy watching the slices change slowly.