This Year I Decided to Make My Own Christmas Cards
Some DIY projects begin with a plan, but this one starts in the most unexpected way.
I’m sorting my craft box, trying to put stray buttons and leftover glitter into small jars, when a bundle of kraft-brown cards slips out from between some papers. I pick them up, look at the neat blank covers, and feel a small spark of excitement.
It’s quiet in the house, my toddler is napping, and I’m already standing at a table covered with craft supplies. So instead of putting the cards away, I decide to start turning them into Christmas cards for my friends.
Step 1: Gathering Whatever I Already Have
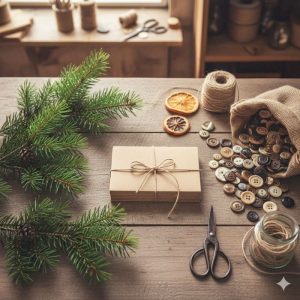
Since the decision is sudden, I don’t buy anything. I look around the craft drawer and take whatever I find:
- A small stack of kraft-brown blank cards
- A bunch of pine sprigs I saved from trimming branches in the backyard
- Loose glitter from an old holiday project
- A bag of mixed buttons
- White acrylic paint
- Star stickers in gold and silver
- Hot glue, craft glue, and scissors
I spread everything across the table and start imagining which pieces might pair well with each other.
Step 2: Preparing the Pine Sprigs

I take each pine sprig, trim the end, and check how it sits on the card. Some sprigs are longer and look like tall trees, while others fan out like branches after a snowy day.
I trim and shape them gently so they stay flat enough to glue down. Moreover, the needles have a soft, natural scent, and working with real greenery makes the cards feel more alive.
Step 3: Gluing Down the Pine Sprigs
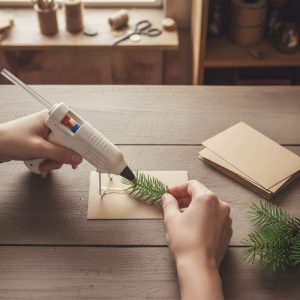
I heat the glue gun, test it on a scrap card, and then place a thin line of glue along the stem of each pine sprig. I lightly press it against the kraft card so it holds in place.
This step is a little messy because pine needles shift around. Then I press slowly and adjust the sprigs until they look like tiny trees. Once the stems are secure, the cards already feel festive.
Step 4: Decorating Each Card With Buttons and Stars

Now I pour my mixed buttons onto the table so I can see all the colors. There are red ones, green ones, and a few soft pastel buttons from old children’s clothes. I pick a handful of the small ones and glue them around the sprig like ornaments.
Then I take the star stickers and place one at the top of each pine branch. Some stars are gold, others silver, so each tree ends up with a slightly different look.
At this point, the cards are already cheerful, but I want to add something that looks like snow.
Step 5: Adding Snow With Paint and Glitter

I use a small brush and add little white paint dots around the card, as if snow is falling. I also brush a few strokes under the tree to create the look of snow on the ground.
While the paint is still wet, I take a pinch of glitter and sprinkle it over a few areas. I don’t cover the card completely, just enough to give it a soft sparkle.
Step 6: Letting Everything Dry
I line the cards up on the table and leave them for 30 minutes. During that time, I walk around the house cleaning up glitter trails and picking up buttons that rolled away. When I come back, the cards feel dry, and the pine sprigs stay in place without shifting.
I look at all seven cards together, each one slightly different, and feel genuinely happy that I followed the sudden urge to start crafting instead of storing those blank cards away again.
Step 7: Writing the Messages Inside
This part comes last because I want to write each card when my mind is calm. I sit down with a pen and open one card at a time.
Step 8: Storing the Cards for Christmas
When all the cards are dry and filled with messages, I place them in a small wooden box I keep on the top shelf of my craft corner.
I don’t want them to bend, so I slide a piece of cardboard at the bottom. Then I close the lid and make a small note: “Cards for Christmas.”
They stay there safely until December arrives. When the season comes, I’ll take them out one by one and give them to the people I thought of while making them like friends, neighbors, and a few family members who appreciate handmade gifts.